
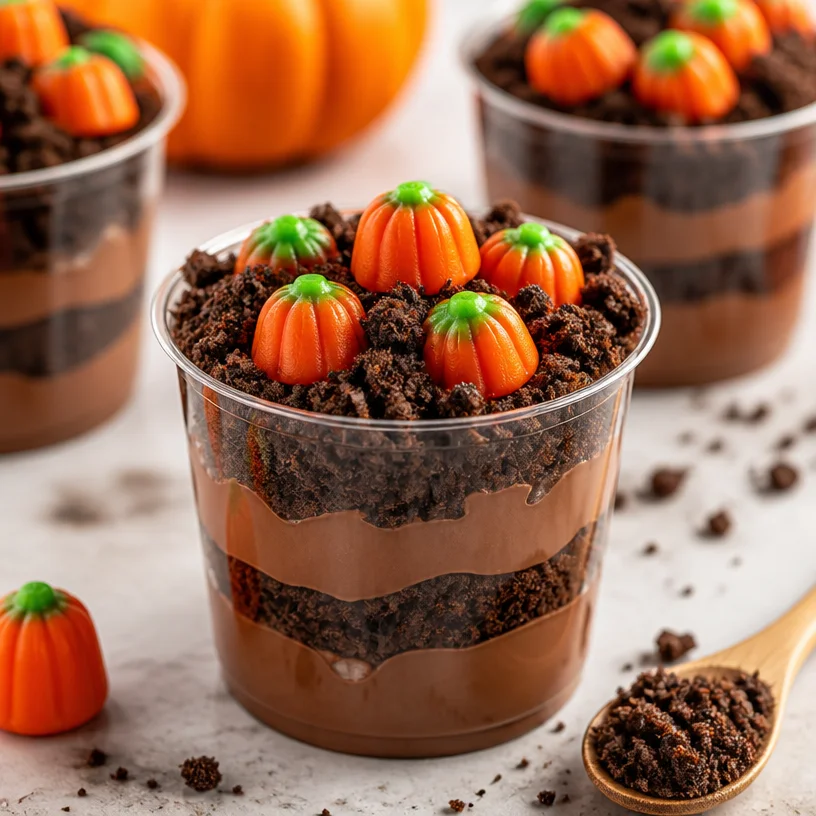
Pumpkin Patch Dirt Cups: A Deliciously Fun Fall Treat
As the leaves turn their vibrant shades of amber and gold, and a crisp chill dances through the air, there’s one thing that’s universally adored by both kids and adults alike: pumpkin patch dirt cups! These delightful treats are not just a feast for the taste buds but also a canvas for creativity in the kitchen. Whether you’re hosting a fall-themed party, celebrating Halloween, or simply looking for a fun dessert to enjoy at home, pumpkin patch dirt cups bring a festive spirit to the table.
Picture this: rich, creamy chocolate pudding layered with crunchy cookie crumbs, topped with adorable candy pumpkins that give it that classic pumpkin patch look. These cups are not only easy to make, but they also evoke a sense of nostalgia, whisking you away to childhood autumn adventures. Trust me, when you serve these beauties, they won’t last long!
Now, let’s dive into the heart of this recipe, where I’ll share a bit of my personal story, the ingredients you’ll need, and the step-by-step instructions to create these charming cups. Oh, and don’t worry—I’ll sprinkle in some tips and personal insights along the way to make your cooking experience as fun and seamless as possible. Ready? Let’s get started!
A Nostalgic Pumpkin Patch Memory
Growing up, every fall brought a sense of excitement and adventure. I remember bundling up in my coziest sweater and heading out with my family to the local pumpkin patch. We’d wander through rows of pumpkins, laughing and searching for the perfect one to carve. Afterward, we’d enjoy hot apple cider and homemade pumpkin bread, realizing that the best memories are often made in the kitchen.
One autumn, my mom decided to host a Halloween-themed dinner party. To make it extra special, she created these adorable dessert cups that looked exactly like mini pumpkin patches! We all loved helping her layer the ingredients—sneaking bites of cookie crumbs when we thought she wasn’t looking. It was one of those magical nights spent surrounded by family, laughter, and the scent of pumpkin spice wafting through the air. That moment stayed with me, inspiring me to recreate those joyful feelings through my cooking.
Ingredients
Here’s what you’ll need to make these adorable pumpkin patch dirt cups (and a few notes along the way):
-
Chocolate pudding: The star of the show! Use a box mix for a quick option or make it from scratch for an extra touch of love. If you’re looking for a dairy-free alternative, instant vegan pudding works like a charm.
-
Cookie crumbs: Classic chocolate sandwich cookies, crushed into fine crumbs to mimic dirt. Don’t have those? Graham crackers can be a delightful stand-in. For a healthier twist, try finely crushed nuts!
-
Candy pumpkins: These adorable mini pumpkins are the perfect finishing touch that adds whimsy to your dirt cup. If you can’t find them, consider using gummy worms for a spooky effect or even chocolate-covered almonds.
Step-by-Step Instructions
Let’s get to the fun part—making these pumpkin patch dirt cups! Follow these detailed steps to bring your creation to life:
-
Prepare the Chocolate Pudding:
Start by making the chocolate pudding according to the package instructions or your favorite recipe. Allow it to chill in the refrigerator for at least 30 minutes, so it thickens up beautifully. Trust me when I say texture is key! -
Crush the Cookies:
While the pudding chills, it’s time to tackle those cookies. Place the chocolate sandwich cookies in a zip-top bag and use a rolling pin to crush them into fine crumbs. A little aggression in the crushing process releases all that wonderful chocolatey goodness. If you prefer to keep things mess-free, you can also pulse them in a food processor. -
Layer the Pudding and Cookie Crumbs:
Grab your favorite clear cups or mason jars—you want to let those gorgeous layers shine! Start by adding a generous layer of chocolate pudding to the bottom of each cup, followed by a layer of cookie crumbs. Repeat the layers until you reach the top, finishing with cookie crumbs to create that ‘dirt’ look. -
Top with Candy Pumpkins:
Now for the pièce de résistance! Carefully place a few candy pumpkins on top of the cookie crumb layer. You want them to look like they’re nestled in the dirt, ready for harvest. For extra flair, you can even add a sprig of mint for a little greenery! -
Chill and Serve:
Pop your dirt cups back into the fridge for about 15 minutes. This helps everything set together nicely. Once they’re chilled, they’re ready for prime time!
Serving Suggestions
For a delightful presentation, serve your pumpkin patch dirt cups on a rustic wooden platter or festive Halloween-themed tableware. You could even place some mini pumpkins or gourds around the plates to enhance that pumpkin patch vibe. Your guests will certainly be in for a treat visually!
Recipe Variations
While I love the classic version of these dirt cups, there are so many fun ways to give them a twist:
-
Pumpkin Spice Pudding: Swap out the chocolate pudding for pumpkin spice pudding to switch up the flavor while keeping that fall spirit.
-
Nutty Crust: Substitute cookie crumbs with crushed pecans or walnuts for a delightful crunch and a hint of nuttiness—perfect for those who love a little texture!
-
Vegan Option: Use plant-based pudding and coconut whipped cream to make this dessert dairy-free, ensuring that everyone can join in on the sweetness.
-
Chocolate Mousse Layers: For an extra indulgent twist, layer in some chocolate mousse between the pudding and cookie crumb layers for a decadent dessert.
-
Fruit Bottom Layer: Add a layer of crushed fruit, like strawberries or raspberries, at the bottom of the cup for a fun surprise and a refreshing burst of flavor.
Chef’s Notes
I can’t tell you how many times I’ve made these pumpkin patch dirt cups for gatherings, and they always steal the spotlight! One time, I even tried to get a bit fancy by layering some caramel sauce with the pudding for an extra sweet touch—it was amazing! Just remember, the key is to keep it fun, and the simplest twists can lead to the most delightful surprises.
Also, don’t stress too much about perfection—each cup can look a little different, and that’s part of the charm!
FAQs and Troubleshooting
1. How can I make the pudding from scratch?
Absolutely! Combine 2 cups of milk, 1/2 cup sugar, 1/3 cup cocoa powder, and 1/4 cup cornstarch in a saucepan. Stir over medium heat until thickened, then remove from heat and add in 1 tsp of vanilla extract. Chill before layering.
2. Can I make these ahead of time?
Yes! You can prepare the cups in advance and keep them in the fridge for 1-2 days. Just wait to add the candy pumpkins until you’re ready to serve them!
3. What can I do if my pudding doesn’t thicken?
If your pudding isn’t thickening, ensure the heat is sufficiently high when cooking. If it doesn’t work out, use cornstarch as a thickening agent by mixing 1 tablespoon with a bit of cold milk and stirring it in.
4. How do I store leftovers?
Store any leftovers in an airtight container in the fridge for up to 3 days. Just keep in mind that the cookie crumbs may become a little softer over time.
Nutritional Info
While I suggest enjoying these delicious dirt cups in moderation, here’s a rough estimate of the nutritional info per serving:
- Calories: ~200 kcal
- Fat: 8g
- Carbohydrates: 30g
- Protein: 3g
I hope you’re feeling inspired to whip up this seasonal dessert! Remember, cooking should be a joyful experience filled with laughter and love. So grab your mixing bowls and let’s create some unforgettable pumpkin patch dirt cups that your friends and family will crave every fall! Happy cooking!
PrintPumpkin Patch Dirt Cups

A delightful fall treat made with chocolate pudding, cookie crumbs, and candy pumpkins that evoke the spirit of pumpkin patches.
- Prep Time: 15 minutes
- Cook Time: 30 minutes
- Total Time: 45 minutes
- Yield: 4 servings
- Category: Dessert
- Method: Chilling
- Cuisine: American
- Diet: Vegetarian
Ingredients
- Chocolate pudding (box mix or homemade)
- Chocolate sandwich cookies, crushed
- Candy pumpkins
Instructions
- Prepare the chocolate pudding according to package instructions or your favorite recipe. Allow it to chill in the refrigerator for at least 30 minutes.
- Crush the cookies in a zip-top bag or food processor until fine.
- Layer the pudding and cookie crumbs in clear cups or mason jars, starting with pudding.
- Top with candy pumpkins on the cookie crumb layer.
- Chill in the fridge for about 15 minutes before serving.
Notes
Customize with variations like pumpkin spice pudding or a nutty crust. Store leftovers in an airtight container.
Nutrition
- Serving Size: 1 cup
- Calories: 200
- Sugar: 15g
- Sodium: 150mg
- Fat: 8g
- Saturated Fat: 3g
- Unsaturated Fat: 5g
- Trans Fat: 0g
- Carbohydrates: 30g
- Fiber: 1g
- Protein: 3g
- Cholesterol: 5mg
Keywords: pumpkin, dirt cups, fall dessert, Halloween treat, fun dessert