
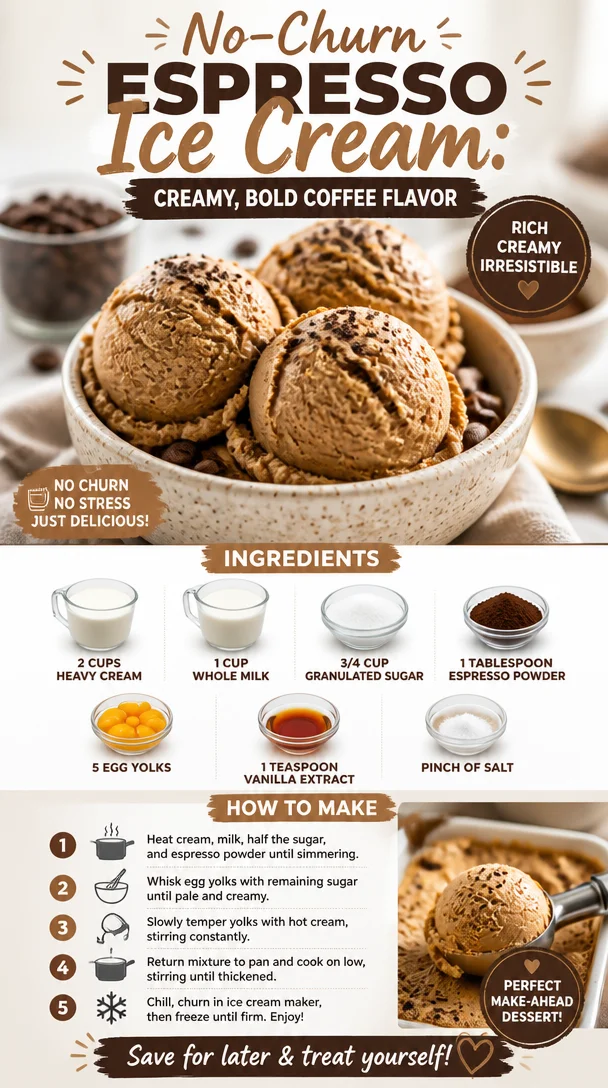
Espresso Coffee Ice Cream: A Dreamy Dessert for Coffee Lovers
Welcome, fellow foodies! If you have a love affair with coffee and, like me, have a particular weakness for ice cream, then you’re in for a real treat today. We’re diving into the rich, creamy world of Espresso Coffee Ice Cream—a delightful way to combine our two favorite indulgences into one marvelous dessert. Imagine creamy, velvety ice cream that not only cools you down but also wakes up your taste buds with every spoonful. Sounds tempting, doesn’t it?
Let’s kick things off with a little story from my own culinary adventures, which I’ll sprinkle throughout this blog post, just like a dash of espresso powder in our delightful frozen concoction.
A Coffee-Lover’s Nostalgia
Growing up, one of my fondest memories is of my grandmother’s kitchen, where the aroma of freshly brewed coffee often mingled with sweet treats coming from the oven. Whenever I visited her, she would whip up her famous coffee cakes and serve them up with a generous scoop of homemade ice cream. While I loved that sweet cake, it was the coffee ice cream that left an indelible mark on me. Rich, smooth, and with just the right amount of caffeine kick—what’s not to love?
One hot summer afternoon, I decided to recreate that magic. Armed with my grandmother’s old ice cream maker and a healthy dose of determination, I spent the day experimenting. Each churn brought me closer to that nostalgic flavor, and with every taste, I was transported back to her cozy kitchen filled with laughter and love. The result? A silky, satisfying Espresso Coffee Ice Cream that felt like a hug in a bowl. Now, I’m excited to share this treasured recipe with you all!
Ingredients
Before we jump into the fun of making our ice cream, let’s gather our ingredients. This recipe is straightforward but oh-so-rewarding. Here’s what you’ll need:
-
2 cups heavy cream: This is the creamy base of our ice cream. It adds richness and that buttery texture. If you’re looking for a lighter version, substitute with half-and-half, but keep in mind it might not be as creamy.
-
1 cup whole milk: This helps balance the heaviness of the cream. You can swap it with any plant-based milk, like almond or oat milk, if you want a non-dairy alternative.
-
3/4 cup granulated sugar: This sweetens our mixture and helps create that soft ice cream texture. You can replace it with coconut sugar or a sugar substitute if you’re watching your sugar intake.
-
1 tablespoon espresso powder: This is where the real coffee magic happens. If you don’t have espresso powder, finely ground coffee can work in a pinch, but the flavor may not be as concentrated.
-
5 egg yolks: These game-changers add richness and help emulsify our mixture for a smooth consistency. If you’re looking for a vegan version, you can use silken tofu blended until smooth as a substitute.
-
1 teaspoon vanilla extract: Vanilla enhances the coffee flavor and rounds out our recipe beautifully. Always opt for pure vanilla extract for the best taste!
-
Pinch of salt: A tiny bit of salt enhances all the other flavors and balances the sweetness perfectly.
Step-by-Step Instructions
Alright, let’s roll up our sleeves and dive into the delightful process of making espresso coffee ice cream! You’re going to love how simple and satisfying this is.
-
Prepare the Cream Base: In a large mixing bowl, whisk together the heavy cream, whole milk, granulated sugar, espresso powder, and a pinch of salt until the sugar is dissolved. This base is what will become our dreamy ice cream.
-
Heat the Mixture: Pour the cream mixture into a medium saucepan and gently heat it over medium-low heat. Keep an eye on it! You want to warm it up until it’s steaming, not boiling—this should take about 5-7 minutes.
-
Whisk the Egg Yolks: While your cream mixture is heating, grab another bowl and whisk the egg yolks until they’re pale and frothy. This will help create that luxurious texture in our ice cream.
-
Tempering the Yolks: Now, here’s a little chef hack: to prevent our yolks from scrambling, we need to temper them. Carefully ladle a few spoonfuls of the warm cream mixture into the yolks, whisking constantly. This step is crucial! Gradually add more of the cream to the yolks until they’re completely mixed.
-
Combine and Cool: Once you have a nice yolk mixture, pour it back into the saucepan with the remaining cream. Stir everything together over low heat for about 5-10 minutes until it thickens slightly. You’ll know it’s ready when it coats the back of a spoon.
-
Strain and Chill: To ensure a silky texture, strain the mixture through a fine-mesh sieve into a clean bowl. This removes any lumps or cooked egg bits! Then, stir in the vanilla extract. Let it cool down to room temperature before covering it and chilling it in the fridge for at least four hours, or overnight for the best flavor.
-
Churn Time: Once chilled, pour the mixture into your ice cream maker and churn according to the manufacturer’s instructions. This usually takes about 20-25 minutes.
-
Freeze to Firm Up: Transfer the churned ice cream to an airtight container and freeze it for at least 2 hours. I know, waiting is the hardest part, but trust me, it’s worth it!
Serving Suggestions
When it’s finally time to scoop into that rich Espresso Coffee Ice Cream, take a moment to enjoy the anticipation. Serve it up in a bowl, or for an extra touch of elegance, scoop it into a chilled glass. Add a drizzle of chocolate sauce or a sprinkle of cocoa powder on top to elevate it even further. For a real coffee lover’s treat, pair it with a shot of espresso on the side—now that’s a match made in heaven!
Recipe Variations
Feeling adventurous? Here are a few fun twists and variations to customize this ice cream to your liking:
-
Mocha Swirl: Add 1/2 cup of chocolate syrup to the mixture while churning for a chocolatey coffee delight.
-
Nutty Goodness: Mix in some crushed hazelnuts or walnuts in the last few minutes of churning to give it a delightful crunch.
-
Coffee Crisp: Crush up some coffee-flavored biscuits (like Biscoff or Ladyfingers) and fold them in right before freezing for added texture.
-
Coffee Cream Frappe: Blend in some powdered sugar and cold brew coffee to make a frappuccino-inspired treat.
-
Vegan Version: Use full-fat coconut milk instead of cream and milk and tofu for yolks for a creamy vegan alternative.
Chef’s Notes
This recipe has truly evolved over time, just like my skills in the kitchen! The first few attempts were definitely “interesting.” A few times, the texture turned out less than perfect, but that’s part of the fun, right? Each batch taught me something new—more sugar for sweetness, longer chilling times for creaminess, and that delicate balance of espresso flavor. Now, I can whip up this tasty treat with my eyes closed!
One of my favorite things about making ice cream is being able to share it with friends and family. There’s just something magical about gathering around with a scoop of homemade ice cream, swapping stories, and making memories!
FAQs and Troubleshooting
1. Why is my ice cream icy instead of creamy?
If your ice cream turns out icy, it might be due to not enough sugar or not churning it long enough. Ensure your mixture is well-chilled before churning, and try to minimize air pockets as you churn!
2. Can I use instant coffee instead of espresso powder?
Absolutely! Instant coffee can work in a pinch, but keep in mind that the flavor won’t be quite as strong. You might want to add a bit more to achieve your desired coffee flavor.
3. My ice cream is too hard after freezing. What do I do?
It can get a bit hard, especially if left in the freezer for a long time. Before serving, let it sit at room temperature for about 10-15 minutes to soften up a bit.
4. How long will my ice cream last in the freezer?
Homemade ice cream is best enjoyed within 2-3 weeks, though it can last longer. To keep it fresh, make sure to store it in an airtight container to minimize ice crystals forming.
Nutritional Info (Optional)
For a serving of this luscious Espresso Coffee Ice Cream, you can expect approximately:
- Calories: 200
- Fat: 16g
- Carbohydrates: 15g
- Protein: 3g
This creamy treat is a delightful indulgence—perfect for savoring on a warm afternoon or as a sweet conclusion to a cozy dinner.
So there you have it! A rich, velvety, and completely satisfying Espresso Coffee Ice Cream recipe that’s bound to impress your friends or simply elevate your solo dessert game. Feel free to experiment and make it your own; after all, the kitchen is your playground! Now, grab a spoon and enjoy every bite. Welcome to the SavoryAddict crew, and happy ice cream making!
PrintEspresso Coffee Ice Cream

A rich and creamy Espresso Coffee Ice Cream that combines the indulgence of coffee and ice cream into one delightful dessert.
- Prep Time: 15 minutes
- Cook Time: 30 minutes
- Total Time: 180 minutes
- Yield: 8 servings 1x
- Category: Dessert
- Method: Churning
- Cuisine: Italian
- Diet: Vegetarian
Ingredients
- 2 cups heavy cream
- 1 cup whole milk
- 3/4 cup granulated sugar
- 1 tablespoon espresso powder
- 5 egg yolks
- 1 teaspoon vanilla extract
- Pinch of salt
Instructions
- Prepare the Cream Base: In a large mixing bowl, whisk together the heavy cream, whole milk, granulated sugar, espresso powder, and a pinch of salt until the sugar is dissolved.
- Heat the Mixture: Pour the cream mixture into a medium saucepan and gently heat it over medium-low heat until it’s steaming.
- Whisk the Egg Yolks: In another bowl, whisk the egg yolks until pale and frothy.
- Temper the Yolks: Carefully ladle a few spoonfuls of the warm cream mixture into the yolks, whisking constantly, then gradually add more of the cream.
- Combine and Cool: Pour the yolk mixture back into the saucepan with the cream and stir over low heat until it thickens slightly.
- Strain and Chill: Strain the mixture through a fine-mesh sieve, stir in the vanilla extract, and let it cool in the fridge for at least four hours.
- Churn Time: Pour the chilled mixture into your ice cream maker and churn according to the manufacturer’s instructions.
- Freeze to Firm Up: Transfer the churned ice cream to an airtight container and freeze for at least 2 hours before serving.
Notes
For best results, use pure vanilla extract and ensure the mixture is well-chilled before churning. Consider adding mix-ins like chocolate syrup or nuts for customized flavors.
Nutrition
- Serving Size: 1 serving
- Calories: 200
- Sugar: 15g
- Sodium: 50mg
- Fat: 16g
- Saturated Fat: 10g
- Unsaturated Fat: 6g
- Trans Fat: 0g
- Carbohydrates: 15g
- Fiber: 0g
- Protein: 3g
- Cholesterol: 186mg
Keywords: ice cream, coffee, dessert, espresso, homemade ice cream