
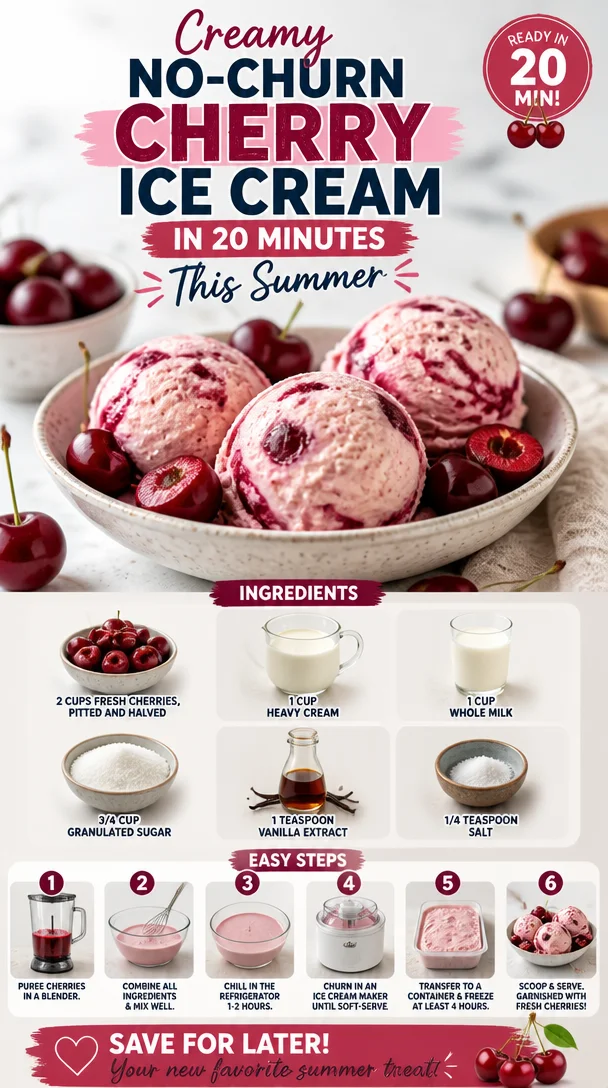
Dreamy Cherry Ice Cream: A Summer Delight
Let’s talk ice cream, shall we? You know, the frozen treat that somehow makes every day feel like a celebration? Whether it’s a hot summer day or a cozy winter night, nothing quite compares to a scoop of creamy, dreamy ice cream. Today, we’re diving into a delightful recipe for Dreamy Cherry Ice Cream, and let me tell you, it’s a game-changer. This recipe is all about keeping things simple, delicious, and absolutely unforgettable.
But first, let’s set the scene. Picture this: a sunny day, the scent of blossoms in the air, and a bowl of homemade cherry ice cream in your hand. The sun is shining, and you can hear laughter in the background. As the first creamy spoonful hits your tongue, you’re transported back to your childhood — remember those long summer afternoons filled with ice cream trucks and sticky fingers? Well, I want to bring that nostalgia right to your kitchen, so you can create those same moments with your family today.
With just a handful of ingredients, you’ll create a cherry ice cream that’s bursting with flavor and texture. The sweet, juicy cherries mix beautifully with the rich creaminess, creating a treat that’s not just enjoyable but also invites you to come back for more. And the best part? You don’t need any fancy equipment or skills. Just your love for good food and a pinch of patience.
So let’s roll up our sleeves and transform your kitchen into an ice cream parlor. Trust me; you’re going to want to make this Dreamy Cherry Ice Cream again and again. Ready to dive in? Let’s go!
A Nostalgic Cherry Memory
Growing up, my family had a tradition that revolves around cherry-picking at a local orchard every summer. I still vividly remember the thrill of plucking those plump, juicy cherries right off the branches. My younger self would munch on them as we filled our baskets, leaving little room for any to make it home. The best part was when we returned, and my mom would whip up an incredible cherry pie, while my dad would take on the ice cream-making duties.
There was something magical about watching him blend the fresh cherries with rich cream, all while we impatiently waited with our bowls in hand. That bright red, creamy mix bobbing with cherry pieces was something I looked forward to every year, the perfect ending to a fun-filled day. Now, as an adult, I find joy in recreating those memories in my own kitchen, and I can assure you, it tastes just as dreamy as I remember. And now I’m excited to share that very cherry ice cream recipe with you!
Ingredients
Here’s what you’ll need to whip up this dreamy delight:
-
2 cups fresh cherries, pitted and halved
Fresh, sweet cherries are the star of this recipe! Look for plump cherries that are deep red in color. If you can’t find fresh cherries, you can substitute with frozen cherries, but ensure they’re pitted. -
1 cup heavy cream
This ingredient adds that luscious creaminess to the ice cream. If you’re looking for a lighter option, you could use half-and-half, but the texture won’t be quite as rich. -
1 cup whole milk
Whole milk keeps the ice cream creamy and smooth. You could substitute with 2% milk, but avoid skim as it will lead to a less creamy texture. -
3/4 cup granulated sugar
Sugar adds sweetness and helps to balance the tartness of the cherries. For a different flavor, try using brown sugar, which will give a lovely caramel note. -
1 teaspoon vanilla extract
This enhances the flavor, making it even more irresistible. Feel free to use a good quality vanilla bean or paste for an extra flavor punch. -
1/4 teaspoon salt
A pinch of salt elevates the sweetness and brings all the flavors together. If you prefer, you could use sea salt for a slightly different flavor dimension.
Step-by-Step Instructions
Now, let’s get cooking! Follow these steps, and you’ll be savoring your dreamy cherry ice cream before you know it.
-
Prepare the Cherries
Start by washing your cherries carefully. Remove the stems, then slice them in half and pit them. As you do this, sneak a cherry or two — they’re irresistible! Set aside about 1/2 cup of the halved cherries for topping later. -
Blend the Base
In a blender or a mixing bowl, combine the heavy cream, whole milk, granulated sugar, vanilla extract, and salt. Mix until the sugar has dissolved completely. If using a blender, a quick pulse will do. This is the point where you can take a taste; if you like it extra sweet, feel free to add a spoonful more sugar. -
Add the Cherries
Fold the halved cherries into your creamy mixture. Make sure to leave some chunks so you get that delightful fruitiness in every bite. You want to keep the cherries visible and not completely blended in — that’s where the fun flavor comes from! -
Chill the Mixture
Cover the mixture and refrigerate for about 2 hours. This chilling step helps the flavors to really meld together, resulting in a beautifully rich ice cream. -
Churn It
If you have an ice cream maker, pour the chilled mixture into it and churn according to the manufacturer’s instructions (usually about 20-25 minutes). If you don’t have an ice cream maker, pour the mixture into a shallow dish and freeze it. Every 30 minutes, stir it with a fork to break up any ice crystals until it’s firm (about 3-4 hours). -
Incorporate the Reserved Cherries
When your ice cream is almost ready, fold in the reserved halved cherries. This step ensures every scoop is bursting with that fresh cherry goodness. -
Freeze It Up
Transfer the ice cream into an airtight container and freeze for another 2-4 hours to firm up. I know, the waiting part is tough, but the end result is worth it!
Serving Suggestions
When it comes to serving your dreamy cherry ice cream, presentation is key! Scoop out generous portions into bowls, and for an added touch, top with fresh cherries or a drizzle of chocolate sauce. You can also sprinkle some crushed nuts or a few mint leaves for that fresh vibe. Trust me, a little garnish makes all the difference and impresses anyone you serve it to!
Recipe Variations
- Chocolate-Lovers Delight: Add some cocoa powder to the base mix before churning for a delicious chocolate cherry ice cream.
- Cheesecake Twist: Mix in some cream cheese or mascarpone cheese for a creamy cheesecake-inspired flavor.
- Vanilla Swirl: Swirl in some extra vanilla extract or even some vanilla bean paste for an added depth of flavor.
- Nutty Flavor: Toss in some crushed almonds or pecans for a crunchy texture that pairs perfectly with the cherries.
- Vegan Twist: Replace heavy cream and milk with coconut milk and cashew milk. Use a plant-based sweetener (like maple syrup) instead of granulated sugar for a delicious vegan option.
Chef’s Notes
This Dreamy Cherry Ice Cream recipe has been a work in progress for me over the years. When I first started making ice cream, I experimented with different fruit combinations, and there were a few epic fails. I once tried a basil and cherry mix — let’s just say that didn’t go over well at my dinner table! But through those cooking adventures, I discovered the simple joy of working with fresh ingredients, and this cherry recipe remains a fan favorite.
And if you have any leftover cherries, don’t worry! You can always throw them in a smoothie or use them in a savory dish.
FAQs and Troubleshooting
1. My ice cream is too icy!
This might happen if it wasn’t churned long enough. Make sure to blend it well to incorporate enough air, or try using more heavy cream instead of milk for creamier results.
2. Can I use frozen cherries?
Absolutely! Just let them thaw a bit before pitting and halving them, then proceed with the recipe as usual.
3. Why isn’t my ice cream solidifying?
If your mixture didn’t chill properly or you didn’t churn it enough, it may take longer to set. Next time, try chilling longer or ensure that your ice cream maker is fully frozen before using it.
4. Can I add more sugar?
Of course! Taste as you go while mixing, and adjust the sugar according to your sweetness preference. Just keep in mind that too much sugar can prevent the ice cream from freezing properly, so balance is key.
Nutritional Info (Optional)
For those curious, one serving (1/2 cup) of this dreamy cherry ice cream is approximately:
- Calories: 200
- Total Fat: 12g
- Saturated Fat: 7g
- Carbohydrates: 24g
- Sugars: 20g
- Protein: 2g
Remember, these are rough estimates and can vary based on the specific ingredients used!
And there you have it — a way to relive childhood memories and treat yourself and your loved ones to something truly special. Enjoy every scoop of this dreamy cherry ice cream and relish in the joy it brings. Happy cooking!
PrintDreamy Cherry Ice Cream

A nostalgic and creamy cherry ice cream recipe that’s perfect for summer.
- Prep Time: 15 minutes
- Cook Time: 0 minutes
- Total Time: 180 minutes
- Yield: 4 servings 1x
- Category: Dessert
- Method: Churning/Freezing
- Cuisine: American
- Diet: Vegetarian
Ingredients
- 2 cups fresh cherries, pitted and halved
- 1 cup heavy cream
- 1 cup whole milk
- 3/4 cup granulated sugar
- 1 teaspoon vanilla extract
- 1/4 teaspoon salt
Instructions
- Prepare the cherries by washing and pitting them, then set aside.
- Blend the cream, milk, sugar, vanilla, and salt until dissolved.
- Add the halved cherries to the mixture, folding gently.
- Chill the mixture in the refrigerator for about 120 minutes.
- Churn the chilled mixture in an ice cream maker or freeze while stirring every 30 minutes.
- Incorporate the reserved cherries before final freezing.
- Freeze the ice cream in an airtight container for 120 to 240 minutes.
Notes
For added flair, garnish with fresh cherries or a drizzle of chocolate sauce upon serving.
Nutrition
- Serving Size: 1/2 cup
- Calories: 200
- Sugar: 20g
- Sodium: 50mg
- Fat: 12g
- Saturated Fat: 7g
- Unsaturated Fat: 4g
- Trans Fat: 0g
- Carbohydrates: 24g
- Fiber: 1g
- Protein: 2g
- Cholesterol: 40mg
Keywords: cherry ice cream, summer dessert, homemade ice cream, nostalgic recipes